


How to Install Tails 4.2 on a USB Drive on Mac OS and Launch Tor Browser

At Wisevu we take web security seriously, so if you want to learn how to privately and anonymously surf the web in the safest way possible without leaving a trace on your personal or work station, this article will show you exactly how to do this using Tails OS 4.2 and the Tor Web Browser using Apple’s Mac.
UPDATE: We have created a new article and video on Youtube which shows how to install the latest version of Tails 4.11 on a USB stick and run in on Mac computers including the latest Mac Book Pro’s with touch-pads. This video will also show you how to install Tails 4.18 and later versions of Tails as well. You can read the article here – How to Install Tails 4.11 on a USB Drive on Mac OS and Launch Tor Browser and watch the new video here – Video How to Install Tails 4.11 on a USB Stick on Mac OS and Launch Tor Anonymously. However, if you still rather learn how to instal Tails 4.2 on your Mac, then check out the article and video below.
Tails 4.2 doesn’t work on several of the latest models of Mac computers, however the latest version of Tails 4.11 does, learn which Mac’s/OS Tails 4.2 works on and on which it doesn’t in the article below, or click here.
As per Wikipedia,
“Tails or The Amnesic Incognito Live System is a security-focused Debian-based Linux distribution aimed at preserving privacy and anonymity. All its incoming and outgoing connections are forced to go through Tor, and any and all non-anonymous connections are blocked. The system is designed to be booted as a live DVD or live USB, and will leave no digital footprint on the machine unless explicitly told to do so.”
In this article and video, we show you how to Download and Verify Tails OS 4.2 (latest version at the time of writing this article) and install it on a USB drive on Mac OS X, completely free, without having to burn any DVD’s.
Tails 4.2 Does Not Work On All Macs
We tested Tails 4.2 on several different Mac computers. The USB stick with Tails 4.2 works on the iMac Late 2013 model running Mac OS High Sierra Version 10.13.6. It does not load on the following Apple Mac’s – MacBook Pro 2018 model with touch-bar running macOS Catalina Version10.15.7 and Version 10.15.5, MacBook Pro 2018 model running macOS Mojave Version 10.14.5, MacBook Air Early 2015 running macOS Catalina Version 10.15.7 and Version 10.14.6, iMac 2010 model running OS X El Capitan Version 10.11.16 and MacBook Air early 2013 running macOS Mojave Version 10.14.6. Please let us know if it works on your Mac Model/Version so that we can alert tails support. You should also report yourself is as per this article to help improve Tails.
Aside from our above tested Mac models/OS versions, we had Youtube users report that Tails also worked on:
2017 Mac versions
Macbook Air 2013 running OS 10.15,
Other Youtube users reported that Tails 4.2 does not work on
Macbook Pro with Touchbar (2019)
Macbook Pro Late 2016
But we have not tested the above mentioned Macs ourselves, we will however continue testing Tails on newer Mac versions and will provide an update above.
With that said, let’s get started!
Please note that you will need a USB thumb drive that is at least 8GB and it must be formatted using the Mac OS Extended (Journaled) Format with the GUID Partition Map Scheme. If you do not see the Scheme option, that is fine as well.
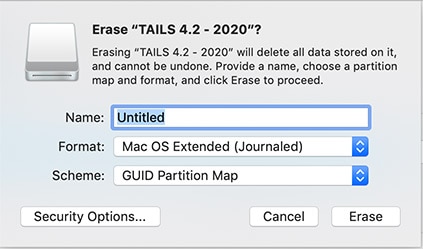
Open Disk Utility > Right click on your flash drive in the left > click Erase > Format Mac OS Extended (Journaled)
How to Download and Verify Tails on Mac OS
Go to https://tails.boum.org/
Click the Install Tails 4.2 link, click Mac OS link, click Install from Mac OS link, click the Let’s Go link
- Download the iso image of the latest Tails OS
- Click the link that says “See instructions for basic OpenPGP verification.” and then
- Download Tails signing key
- Download the OpenPGP signature for the Tails 4.2 USB image
Wait until the Tails OS image iso file is downloaded to your computer. Then put all 3 downloaded files in a folder called tails on your desktop.
Go to pgptools.org and download the PGP suite, install it, then click Import and locate the Tails signing key file and double click it.
Open terminal
Type: cd ~/Desktop/tails (hit enter) (this is the location of the 3 files you downloaded from the Tails website.
Next type ls into Terminal to list the files in the directory and hit enter. The 3 files mentioned above will be listed (in my case the following 3 files: tails-amd64-4.2.iso, tails-amd64-4.2.iso.sig, tails-signing.key)
Next type gpg —verify tails-amd64-4.2.img.sig tails-amd64-4.2.img
(Note the tails file name above will change depending on the version of tails you are installing. You need to enter the name of the .img file from the /Desktop/tails folder.
If the Tails file is legitimate you will get a message that says “Good signature from tails developers <tails@boum.org>” [unknown]
This message indicates that the downloaded Tails OS is legitimate and you can proceed to burn it to a USB Drive or DVD
How to Burn the Tails OS image iso file to a USB stick on Mac OS
You can use the free Etcher software for Mac. Etcher is free, an open-source, cross-platform solution, which allows users to quickly and efficiently create bootable flash drives.
Very simple instructions on how to do this can be found here.
In this article, we will show you how to do it using the Terminal command line on Mac OS. In our video above we show you how to do it using Etcher.
Open terminal
type diskutil list (hit enter) (this will list all storage devices)
In our case, the USB drive is named /dev/disk2 (hit enter)
You can see the size of the drive as an indication if it is the correct USB drive, and also the name of the USB drive is listed.
Next type diskutil unmount /dev/disk2 (hit enter)
If that doesn’t work then type diskutil unmountDisk /dev/disk2 (hit enter) (this will unmount all the volumes in your USB stick)
Next type sudo dd bs=1m if=~/Desktop/tails/tails-amd64-4.2.iso of=/dev/rdisk2 (hit enter) (note – firs file path is the file path of the iso file, the last part of the code is the usb stick. The letter r is added to speed up the process)
Finally type diskutil eject /dev/disk2 (hit enter) Now you can unplug the USB drive and plug it back in.
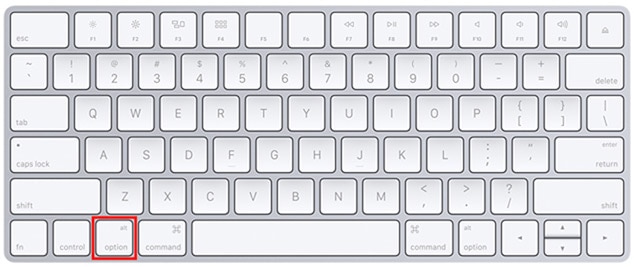
Restart your computer and hold down the Option key on your keyboard as the computer starts up.
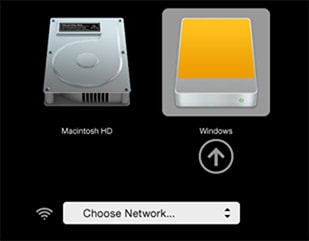
You will see the various bootable drives, one of them will be the USB Drive, the name may say Windows. Click it to boot using Tails OS
I would like to add that the USB stick does not appear in the list of possible startup disks on all Mac’s. We tested it on 4 different Mac computers. The USB stick with Tails 4.2 appeared on our iMac Late 2013 model running mac OS High Sierra Version 10.13.6. It did not load on the following three Macs – MacBook Pro 2018 model running macOS Mojave Version 10.14.5, iMac 2010 model running OS X El Capitan Version 10.11.16 and Macbook Air early 2013 running macOS Mojave Version 10.14.6. To get it working on your Mac, follow the below instructions.
- If the USB stick does not appear in the list of possible startup disks:
- Make sure that you have verified your download of Tails.
- Try installing again on the same USB stick.
- Try installing on a different USB stick.
- Try using the same USB stick to start on a different computer.?If the same USB stick works on a different computer, please report the problem to the Tails help desk as per this article.
Troubleshooting Tails 4.2
Please see below links related to some common problems with Tails
If Tails disk does not show up when you restart your computer while holding down the alt/option key on your keyboard, Tails may not be compatible with your mac model/version. See here for tested Mac models.
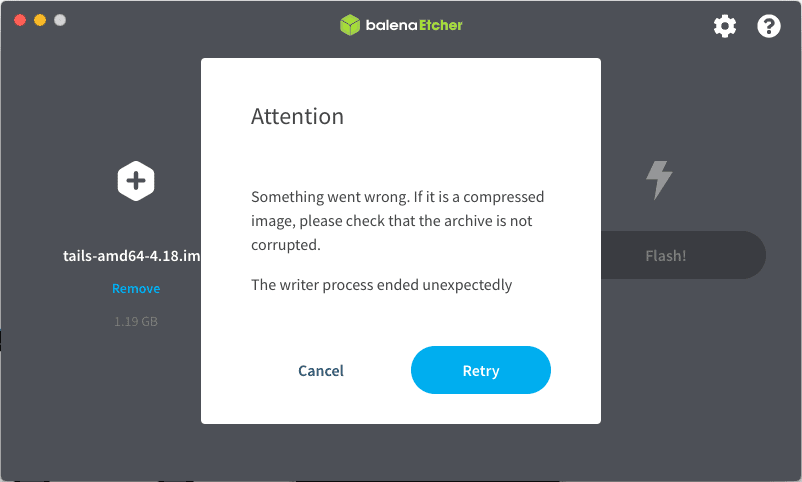
If you get the below error message while trying to Flash Tails with balena Etcher (this happened when I tried Flashing Tails 4.18)
“Attention Something went wrong. If it is a compressed image, please check that the archive is not corrupted. The writer process ended unexpectedly.“ Try clicking Retry, if it persists, then eject the USB drive, plug it back in and try flash it again. This worked for me. If it doesn’t work for you, then you can try again by ejecting the USB drive. If the error persists, try to format your USB drive and try flashing Tails again. If it still doesn’t work try download and verify another Tails and retry and repeat the above process if the error persists.
Security settings do not allow this Mac to use an external startup disk. – If you get this warning read the instructions in the provided link or watch our video here – Security Settings do not allow this Mac to use an external startup disk 2021 SOLVED.
Keyboard and trackpad do not work when Tails loads – The only way to get Tails working on any Mac’s that have a touch-pad is to use an external mouse (preferably wired) and an external keyboard.
Connecting to a WiFi network in Tails – If you cannot use an Ethernet cable, USB tethering or USB Wi-Fi adapter and must connect to WiFi to access Tails , you can try disable MAC spoofing to get your Wi-Fi interface to work in Tails. However, this does not always work. Disabling MAC spoofing has security implications, so read carefully the documentation about MAC spoofing before doing so. Note that even if MAC spoofing is disabled, your anonymity on the Internet is preserved. In this reddit thread on Help with Tails WiFi on Mac Book Pro, it is recommended to use a cheap USB/WiFi adapter. We used the 2.4GHz, 300Mbps, Panda Wireless WiFi Adapter, Model # PAU05 which you can buy on Amazon, and it works. You can watch our 2 minute YouTube video on How to Connect to a WiFi Network Using a USB WiFi Adapter in Tails on a MacBook Laptop.
Are you having any issues installing Tails OS on a Jump Drive on your Mac? What do you use Tails OS for? What is your favourite application on Tails OS? Please do share in the comments below.